Tradepost Pro · version 1.6.4 · setup guide
Set up Tradepost Pro
From the zip file to a store where trade buyers request quotes and reorder from saved lists. No code needed for any of it. Every setting below is named exactly as you’ll see it in the theme editor.
On this page
1. Install
Pro comes as one file, tradepost-pro-1.6.4.zip. Don’t unzip it. Shopify wants the zip as it is.
- In Shopify admin, go to Online Store → Themes.
- Click Import → Upload zip file and pick the zip. It lands in your theme library, unpublished, under the name
tradepost-pro-1-6-4. Your live theme doesn’t change. To rename it: ⋯ → Rename. - On the new theme, click ⋯ → Preview. Open the home page, a collection, a product and the cart.
- Click Edit theme to open the theme editor. Set your logo, menu and home page text.
- Happy with it? ⋯ → Publish. The old theme stays in the library, so you can go back in one click.
What you get on the first install
- The style is Dental & Medical (blue accent, IBM Plex Sans). You can switch in Theme styles. It only changes the look.
- Request a quote and Product compare are off. Saved lists are on, but only logged-in B2B buyers see them.
- Two links point at pages you make in the next step: Apply for a trade account in the footer and Quick order by SKU on the home banner. They show “page not found” until those pages exist.
- The home page text is written for a dental supplier. Change the banner, the columns and the FAQ in the theme editor.
Pages to create
In Online Store → Pages → Add page. The template is the Template menu on the right of the page form.
A new page starts as Hidden. Set Visibility to Visible before you save, or the page gives “page not found” on your store. Once it’s visible, it can take a minute to show up.
- Quick order, template
order-form. Keep the URL handlequick-order, the header already links there. Retail visitors get a login prompt on this page. To open it to everyone, change Show to in the section. - Trade account, template
trade-account, handletrade-account. Then pick it in Theme settings → B2B & wholesale → Trade application page. - Optional: Contact, template
contact.
Shopify only lists the templates of your live theme in that menu. If Pro isn’t published yet, you won’t see order-form, quote or lists. Two ways round it: publish first (fine on a new store), or save the page with the default template and switch it after you publish. To look at a page before that, add ?view=order-form (or ?view=quote, ?view=lists) to its address while you preview the theme.
Last check: open the Header section in the theme editor and look at the menu. If the menu picked there doesn’t exist on your store, the header uses your Main menu.
2. Set up B2B in Shopify
Tradepost shows Shopify’s own B2B data: companies, price lists, volume pricing, quantity rules and payment terms. You set those up in Shopify admin, not in the theme. Without B2B the theme works as a normal retail theme. Request a quote, compare, Brands A–Z and tax labels still work. Saved lists and the sales rep need B2B.
Use the new customer accounts
Shopify B2B only runs on the new customer accounts (Settings → Customer accounts). Shopify then hosts the account pages itself. That’s why Tradepost puts the company name, location switch, payment terms and PO number in the header, product page and cart instead.
Add a company
- Customers → Companies → Add company. Give it a name and at least one location (an address).
- Add a contact: the buyer’s email. That’s what they log in with.
- On the location, set payment terms (Net 30, for example) and whether orders go straight through or wait for your review.
Price lists: depends on your plan
- Basic, Grow, Advanced: prices go through B2B markets. Markets → Add market → B2B, pick the company locations for that market, then give it a catalog with a price list. Shopify allows 3 active B2B catalogs on these plans, and you can’t put a catalog straight on a company location.
- Plus: assign catalogs right to company locations. No limit of 3.
Inside a price list you can add volume pricing (cheaper per unit at higher quantities) and quantity rules (minimum, sold in multiples of, maximum). Tradepost shows both on the product page, product cards, quick order and cart. Need more than 3 price lists on a non-Plus plan, or prices pushed in from your ERP? That’s service work, and we do it.
Show payment terms and order review to buyers
Shopify doesn’t let a theme read a location’s payment terms or its review setting. So Tradepost reads two fields you add once, in Settings → Custom data → Company locations → Add definition:
| Namespace and key | Type | What the buyer sees |
|---|---|---|
depot.payment_terms | Single line text | In the cart: “Payment terms on this account: Net 30.” |
depot.review_orders | True or false | Product page and cart say the order goes for review. The checkout button reads “Submit order for review”. |
Then open each company location and fill them in, matching the real terms on that location. The theme only shows these. It doesn’t change what Shopify does at checkout.
Theme settings for B2B
In Theme settings → B2B & wholesale:
- Who can see prices: Everyone, Logged-in customers only, or Approved B2B accounts only.
- Also hide add-to-cart when prices are hidden: on by default.
- Hide compare-at price for B2B buyers: on by default. With a percentage price list, Shopify shows the retail price crossed out next to every trade price. Most stores don’t want that.
In Theme settings → Cart: Show PO number field, Show order notes, and Show PO number and notes to B2B buyers only (on).
Heads up on PO numbers: B2B checkout has its own PO number field. A PO typed in the cart is saved on the order under Additional details, but it doesn’t fill the checkout field, so buyers may type it twice. If you only want one, turn off Show PO number field and let checkout ask for it.
One thing you might notice: logged-in B2B buyers never see the country selector. Switching country could drop them into retail prices. They still get the language selector. To sell to buyers in another country, add that country to the company location and its market.
3. Turn on each Pro feature
Every Pro feature stays quiet until you give it what it needs. We checked this on an empty store with the 1.6.4 zip: no setup, no errors, and add to cart and checkout worked.
| Feature | If you set up nothing | To turn it on |
|---|---|---|
| Request a quote | Off | Pick a mode in Theme settings → Request a quote, plus a Quote page |
| Saved lists + CSV | On, but hidden until a B2B buyer logs in | A My lists page, plus B2B set up in Shopify |
| Sales rep | Nothing shows | A Sales rep entry, linked to the company |
| Product compare | Off: no button, no bar | Turn it on and pick a Compare page |
| Brands A–Z | Nothing | A page with the brands template |
| VAT ex. / inc. | No tax label | Theme settings → B2B & wholesale → Tax label next to prices |
| Volume tiers on cards | One line: “From $4.05 at 96+” | Switch Volume pricing on product cards to Mini table |
| Wholesale-only products | Off | A tag on the products, and the same tag in theme settings |
Request a quote
Buyers build a quote list next to their cart and send it to you as one email. Good for large equipment, custom builds, anything you price per order. Works on every plan, with or without B2B.
Turn it on:
- Online Store → Pages → Add page “Request a quote”, template
quote. - Theme settings → Request a quote → Request a quote: pick “Only products with the quote tag” or “All products (next to Add to cart)”.
- Same group, Quote request page: pick the page from step 1.
- Tag the products you only sell by quote with
quote-only(or your own tag, set in Quote-only product tag).
Also in that group: Offer a quote when prices are hidden (on by default) gives visitors who can’t see prices a Request a quote button instead, and Button label changes the wording.
What buyers see: quote-only products show “Price on request” and a Request a quote button, no Add to cart. Quick order gets an Add to quote button. The header shows a Quote link with the number of lines.
What you get: one email through your store’s contact form, starting with “Quote request”, then lines like AC-2200 | Class B autoclave 22 L | 2 | need by Friday, plus company, location, phone, needed-by date and message. Reply by email, or make a draft order (Orders → Drafts) and send the invoice.
Limits:
- The quote list is kept in the buyer’s browser. Same device, same browser. Up to 200 lines.
- Quote-only is a theme rule, not a checkout rule. If a quote-only product still gets into the cart (an app, an old cart), the cart hides its price, offers Move to quote and locks Checkout. But a buyer who types
/checkoutdirectly still reaches checkout at the product’s Shopify price. Until you have a Shopify Function blocking it (we build these), set that price to something you’d accept, keep the product out of your B2B catalogs, or make it unavailable on the Online Store and send quotes as draft orders. - The theme hides quote-only prices everywhere it draws them. It can’t hide what other code prints: some B2B apps (BSS B2B, for one) write the whole cart, prices included, into the page source, and Shopify’s own cart data has prices too. If a price must stay secret, keep the product out of that buyer’s catalog.
- Quantities in a quote ignore quantity rules. Buyers can type any number.
Saved lists + CSV
B2B buyers save SKUs and quantities under a name (“Weekly restock”) and load it into the quick order form next time. A list keeps no prices. When it loads, the form uses today’s account price, volume tier, quantity rules and stock.
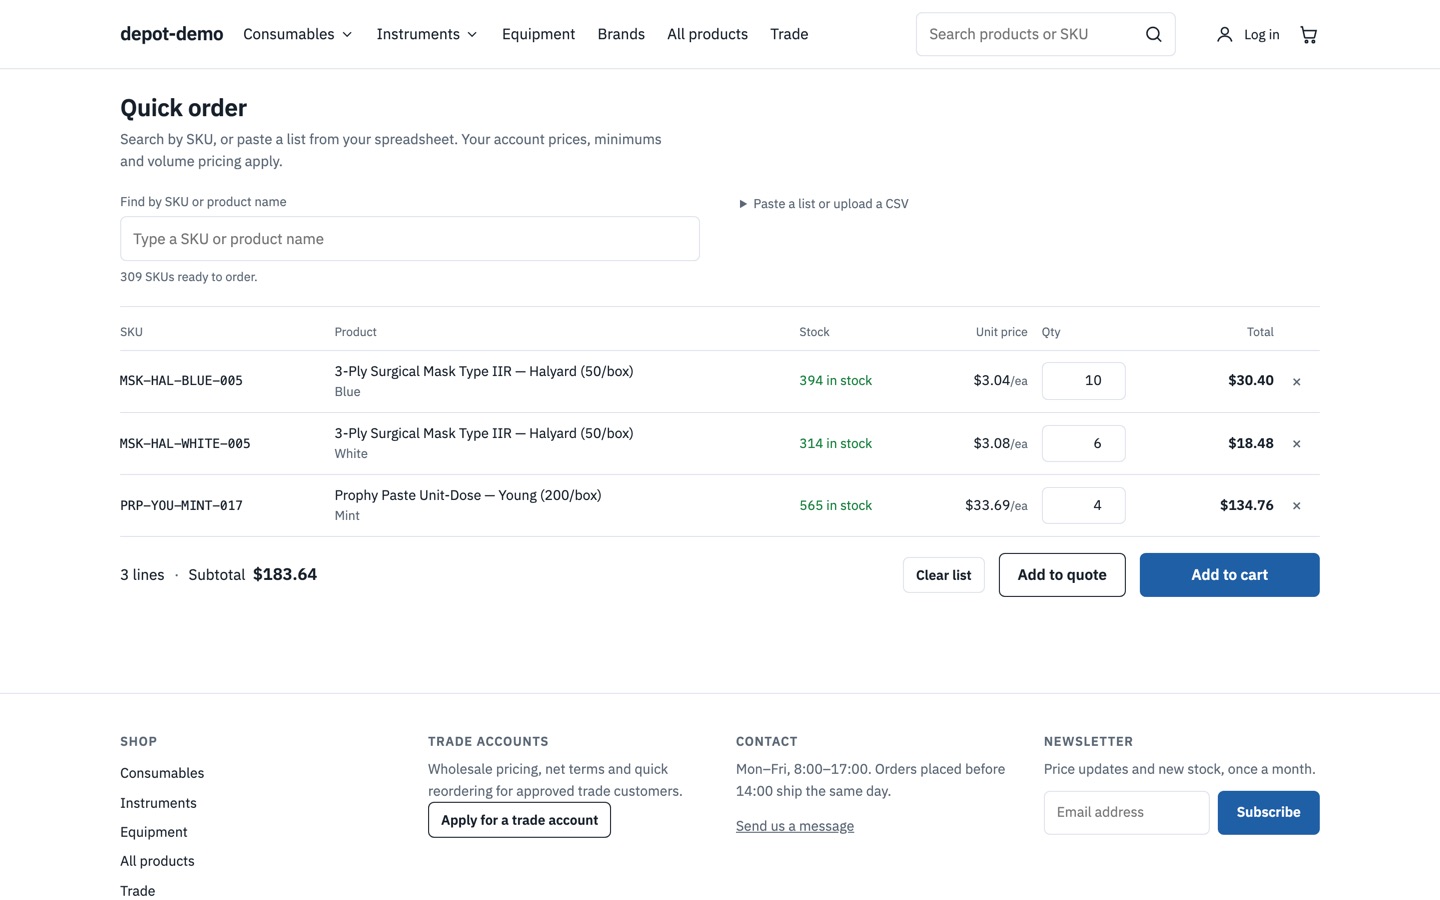
Turn it on:
- Theme settings → Saved lists → Turn on saved lists. It’s already on.
- Add a page “My lists”, template
lists. Pick it in Theme settings → Saved lists → My lists page. Left empty, the theme uses/pages/my-lists. - Same group, Quick order page: pick your Quick order page. Left empty, the theme uses
/pages/quick-order. - Set up B2B (section 2). Only buyers logged in for a company see lists.
Where buyers find it: Save as list on the quick order form, Save cart as list under the checkout button on the cart page, and a Lists link in the header once they have one.
CSV: each list on My lists has Export CSV (columns sku, qty, note, product, variant, variant_id, opens in Excel). Import CSV turns a file into a new list. That’s how a buyer moves a list to another computer or sends it to a colleague.
Limits:
- Lists are stored in the buyer’s browser. They don’t follow the buyer to another device, clearing browser data deletes them, and colleagues don’t see each other’s lists. CSV is the way round it for now.
- 20 lists per company location, 200 lines per list, names up to 60 characters.
- Products no longer in the buyer’s catalog are named in a message when the list loads.
- Lists that sync across devices and colleagues need an app, not a theme. We can build that for you.
Sales rep
B2B buyers see the person who looks after their account: photo, name, title, email, phone and a Book a call link. Retail visitors and companies with no rep see nothing.
Turn it on (once):
- Settings → Custom data → Metaobject definitions → Add definition. Name it “Sales rep”, type
sales_rep. Add these fields, keys exactly as written:name(single line text, required),title,email,phone(single line text),photo(file, images),calendar_url(URL). Turn on Storefront access, or the theme can’t read it. - Settings → Custom data → Companies → Add definition: namespace and key
depot.sales_rep, type Metaobject → Sales rep. - Content → Metaobjects → Sales rep: add one entry per rep.
- Customers → Companies → the company → Metafields → Sales rep: pick the rep.
- In the theme editor, add the Sales rep section to your home page.
Different rep per branch? Add the same depot.sales_rep definition on Company locations. A location’s rep wins over the company’s.
Limits:
- It shows in the Sales rep section and as a small block under the checkout button on the cart page. Not in the cart drawer, and not on the account pages, because Shopify hosts those with new customer accounts.
- No photo means the rep’s initials. Write phone numbers with the country code (+1 555 010 4242).
Product compare
Shoppers tick Compare on up to 4 products. A bar at the bottom of the screen collects them, and the compare page shows them side by side: image, name, SKU, the shopper’s own price, stock, brand and your spec rows.
Turn it on:
- Add a page “Compare”, template
compare. - Theme settings → Product compare: tick Turn on product compare and pick the page in Compare page. Compare stays off until both are done.
- Optional, for spec rows: a product metafield
depot.specs(Settings → Custom data → Products). Use JSON ({"Chamber volume": "22 L"}) or a list of single line text (Chamber volume: 22 L). The Specification table section on the product page reads the same field.
Limits:
- The compare list is kept in the shopper’s browser, not across devices.
- One variant per product: the selected one, or the first available.
- On phones the table scrolls sideways. Row labels stay put.
- Wholesale-only products are left out for retail visitors, with a short note.
Brands A–Z
A page with every brand (product vendor) in your store, grouped by letter, with an A–Z bar on top. Each brand links to Shopify’s page for that vendor.
Turn it on:
- Add a page “Brands”, template
brands, and add it to your menu. - Optional logos: turn on Show brand logos in the section. Then create a metaobject definition, type
brand, fieldsname(single line text) andlogo(file, image), Storefront access on. One entry per brand. The name has to match the vendor exactly.
Limits:
- The list is every vendor in the store. A vendor whose products are all wholesale-only still shows to retail visitors, by name only.
- Brands starting with a number or an accented letter go under “#”.
VAT ex. / inc.
A label that tells buyers whether the price they see includes tax, per buyer or per company. It can also show a second price with or without tax.
Turn it on:
- Theme settings → B2B & wholesale → Tax label next to prices: Follow store tax settings (no label, the default), Automatic: match what this buyer is charged, Label prices as ex. tax, or Label prices as inc. tax. Automatic means retail and B2B buyers can see different labels.
- Tax name: VAT, GST or tax.
- Optional: Show a second price with or without tax and Tax rate for the second price (%), 20 for example.
Per company location you can override it with metafields (namespace depot): depot.tax_display (single line text, ex or inc), depot.tax_rate (number, 0 hides the second price, handy for tax-exempt buyers) and depot.tax_id (only if the location has no tax ID in Shopify). With a label on and a tax ID set, the cart shows the ID under the subtotal.
Limits:
- Display only. The theme never changes what Shopify charges. That’s set in Settings → Taxes and duties, your markets and B2B catalogs.
- The second price is an estimate from one rate. Tax is calculated at checkout. Mixed tax rates in one catalog aren’t handled. Only the product page price and the cart subtotal get a second price.
- If B2B buyers still see prices with tax, fix it in the catalog or market. Not in the theme.
Volume tiers on cards
By default a product card shows one line, like “From $4.05 at 96+”. Mini table turns that line into a small table of quantity ranges and unit prices that opens on click, tap or hover.
Turn it on:
Theme settings → B2B & wholesale: keep Show lowest volume tier on product cards on, then set Volume pricing on product cards to Mini table.
Limits:
- Base price plus up to 3 tiers. With more, a link points to the full table on the product page.
- It shows the card’s first available variant, same as the card price.
Wholesale-only products
Hides trade-only products from retail and logged-out visitors. They don’t show in collections or search, and the product page says “This product is for trade customers”, with Log in and Apply for a trade account.
Turn it on:
- Tag the products, for example
wholesale-only. - Theme settings → B2B & wholesale → Wholesale-only product tag: type the same tag. Capitals count. Leave it empty to turn the feature off.
Limits (please read):
- This is a display rule. The product is still published on your online store. It can still be reached through Shopify’s own product URLs, added to the cart with a direct link, and it stays in the sitemap.
- Shopify adds its own analytics data to every page, and that can include a hidden product’s name and price in the page source.
- Shopify’s own search and product data (
/search/suggest.json,/products/<handle>.js) still return the product and its price. The theme can’t block those. - Filter counts still include hidden products, so a page can show fewer products than expected, or look empty.
- Apps and other sales channels ignore this setting.
If a product must truly be off-limits to retail customers, control it in Shopify: publishing and catalogs decide who can see and buy what. Use this setting for convenience.
4. Theme styles
Pro comes with 4 styles. A style changes colors, fonts, base text size, page width and corner radius. That’s all. Your sections, their order and their settings stay as they are, so you can switch any time.
To switch: Online Store → Themes → Edit theme → Theme settings → Theme style, pick one, Change style, Save. Save any other change first: Shopify greys out Theme style while the editor has unsaved changes. Colors or fonts you change by hand after that are kept until you pick a style again.
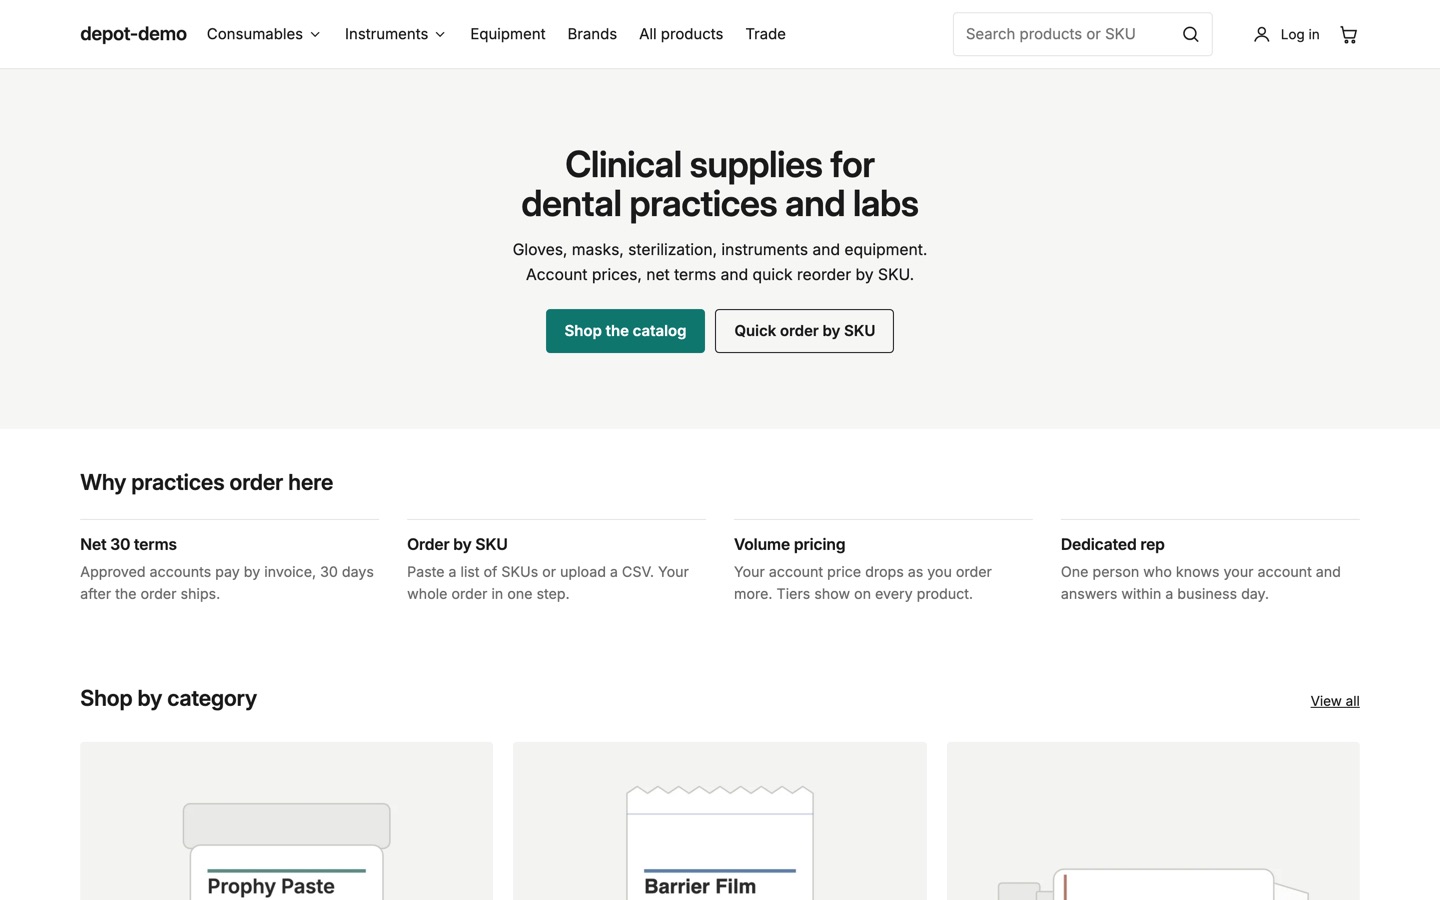
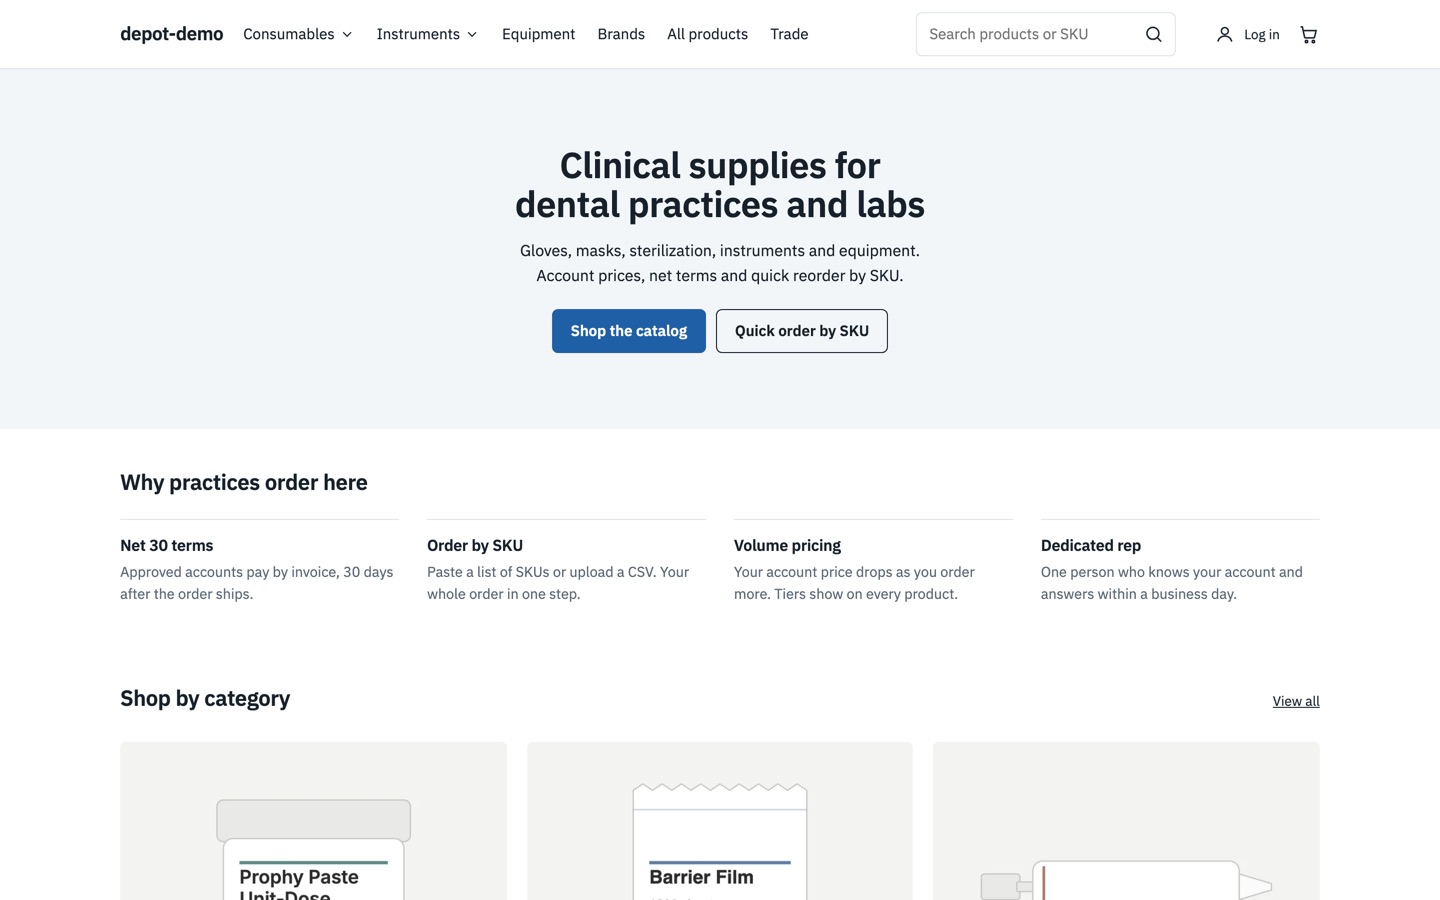
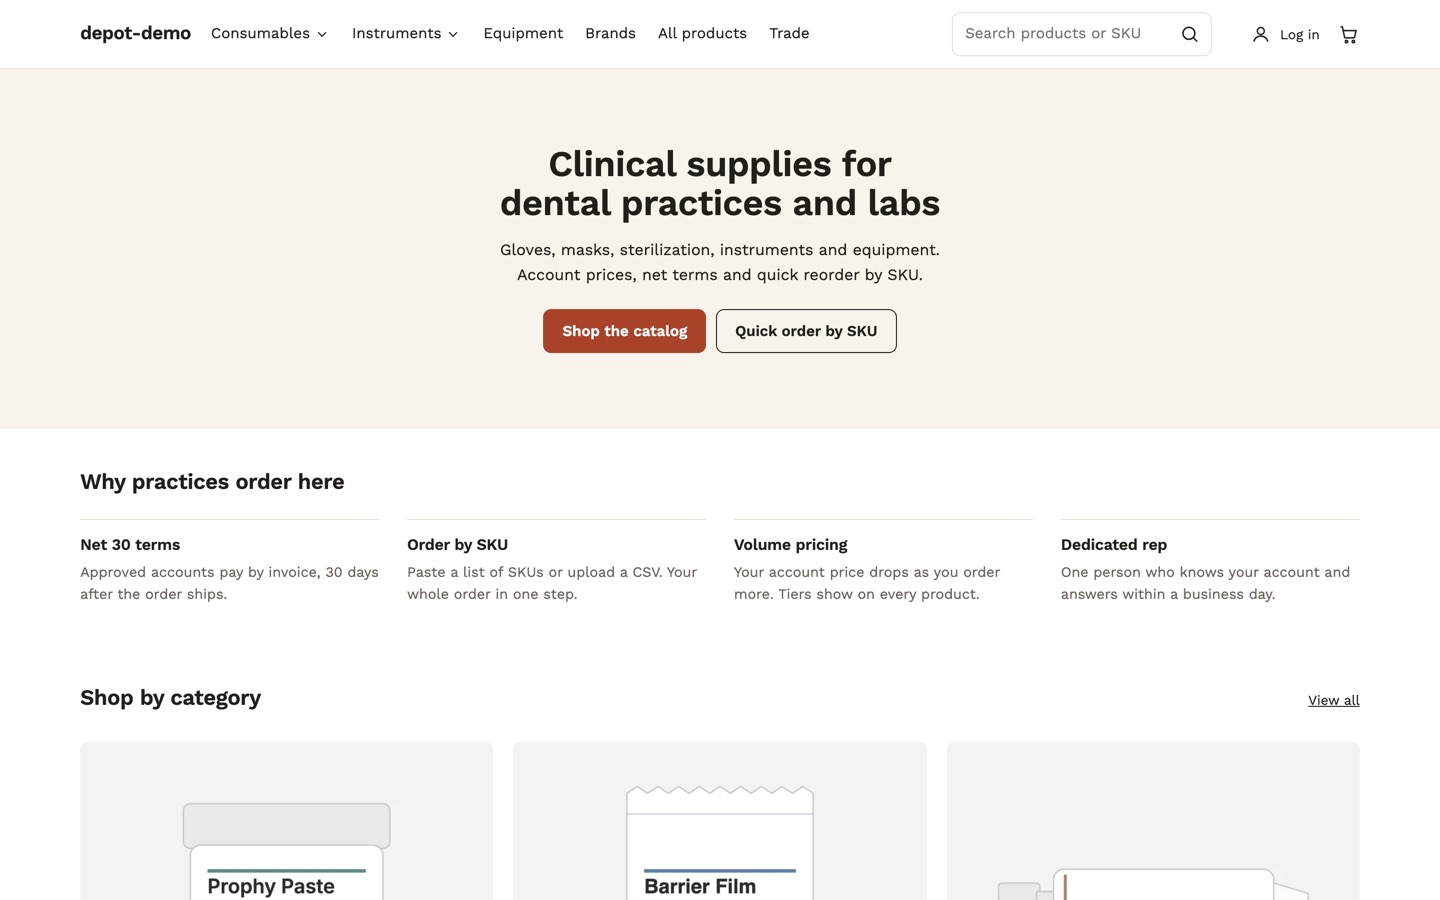
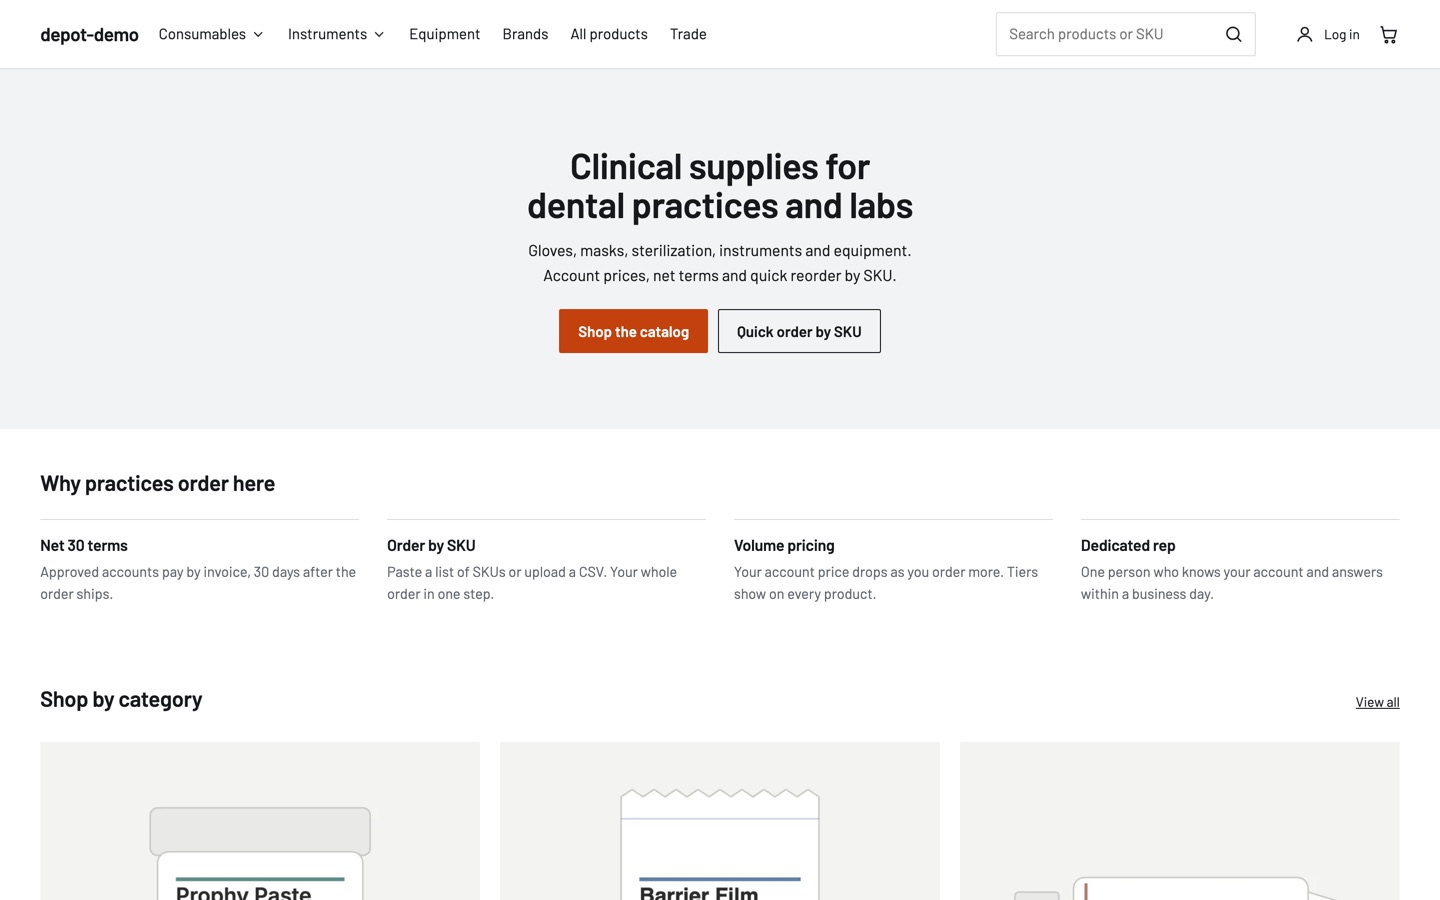
The home page text is the same in all four screenshots (a dental supplier), because a style doesn’t touch content. Write your own banner heading and text for your trade.
Two sections made for Dental & Medical work with any style: Certifications, a row of marks like CE or ISO 13485 (upload only marks you’re allowed to use), and Specification table on the product page, which reads the same depot.specs field as compare.
On a fresh install, Certifications and the Video section on the home page start hidden. Add your own marks or pick a video, then turn the section on in the theme editor.
5. Updating and rollback
Each new version is a new zip with a changelog entry. Settings are never renamed between versions, so yours carry over.
When a new version is out, we email you through Gumroad. Download the new zip from the link in your receipt or from your Gumroad library.
Updates don’t expire: every version we release is yours. Email support runs for 6 months from your purchase.
- Leave your live theme alone. Upload the new zip (Online Store → Themes → Import → Upload zip file). It arrives unpublished.
- Copy your settings across. On the live theme, ⋯ → Download theme file (Shopify emails you a link). From that zip, take
config/settings_data.jsonand any file intemplates/you changed, and upload them into the new theme with ⋯ → Edit code. - Preview the new theme logged in as a B2B buyer: a product page, a collection, the cart, quick order.
- Publish. The old version stays in your theme library.
Rollback: Online Store → Themes → the previous Tradepost → Publish. That’s it. Shopify keeps up to 20 themes, so hold on to the old one until the new version has run for a week.
What a release won’t do: rename or remove a setting, change what a setting means, or add an app or a tracking script. If a release has to change something you rely on, the first line of its changelog entry says so.
6. FAQ
Which Shopify plans does it work on?
All of them: Basic, Grow, Advanced and Plus. Shopify’s B2B (companies, price lists, payment terms) is on every plan now. On non-Plus plans you get up to 3 B2B price lists through B2B markets. Request a quote, compare, Brands A–Z and tax labels work even with no B2B at all.
Do I need an app?
No. Tradepost reads Shopify’s own data. You’d only need an app or custom work for three things: more than 3 price lists on a non-Plus plan, a hard checkout block for quote-only products, and saved lists that sync between devices.
Can I use it on a client's store?
Yes. One license covers one store, and an agency can buy that license for a client. The client store’s development and staging copies are included. A second live store needs a second license.
How do I get updates?
Updates are included with your license. When a new version is out, we email you through Gumroad. Download the new zip from the link in your receipt or from your Gumroad library. Install it as a new theme next to your live one, check it, then publish. Steps in Updating and rollback.
Does Request a quote really block checkout?
Not completely. While a quote-only product is in the cart, the cart locks its Checkout button. But someone who types /checkout in the address bar still gets to checkout, at the product’s normal Shopify price. A theme can’t stop that. A hard block needs a Shopify Function, which we build as a service. Ways around it today are in Request a quote → Limits.
Do saved lists follow my buyers to another computer?
No. Lists live in the buyer’s browser. To move one, the buyer exports it as CSV and imports it on the other computer. Colleagues can share lists the same way.
Will installing it change my live store?
No. Uploading the zip adds an unpublished theme. Customers see nothing until you click Publish, and you can publish your old theme again at any time.
Can I edit the code?
Yes, as much as you want, on the store you bought it for. You just can’t share or resell it. It’s original code, not a copy of Dawn or Horizon.
7. Support and license
Support
Email hello@luma-e.com with your store URL and what you’re stuck on. We answer within one business day.
Included for 6 months from purchase: help installing, setting up B2B and turning on Pro features, and fixes for bugs in the theme. Fixes ship free in the next release.
Not included: changes to the theme’s design or code, other apps, or your store’s data. That’s service work, and we’ll quote it.
License, in three lines
- One purchase covers one Shopify store, including its development and staging copies.
- Change the theme as much as you like for that store. Agencies can buy a license for a client’s store.
- Don’t resell, share or publish the theme or its code, and don’t run one license on a second live store.
Read the full license (v1.2).
Refunds
Email hello@luma-e.com within 14 days with your store URL and what’s not working. If we can’t get the theme running on your store, you get a full refund. Not liking the design isn’t a reason for a refund, so check the screenshots and this guide before you buy.